Translate

maanantai 2. joulukuuta 2013

Proper drumming clothing (DIY Drum Clothing)

One night I couldn't sleep so I tried to dig some cool shape out of an old ragged black tank top. The whole process was done in the bathroom.

Here's how it goes:

1. First drew drumstick shapes to greaseproof paper with the help of your favorite drumsticks. I used Steve Gadd sticks and shortened the stick shape a bit. Use your imagination!

2. Then tape the pattern to the cloth roller cleaned shirt. I also placed thick cardboard inside the shirt, so bleach wouldn't go into backside of the shirt. Don't hesitate on this part! I did, so result aren't perfect.

3. Pour the bleach CAREFULLY in to the (small) spray bottle. Only bottle I found at that moment was a bit too small, but did the job fine after a couple of re-fillings.

4. Spray the bleach on the pattern. Leave the shirt for awhile and let the bleach do the job. Don't let animals or children anywhere near this process.

5. Come back, flush and rinse the shirt well on a sink or on the bathroom floor. Let the shirt dry. Remember that bleached clothes can ruin other clothes as well in the washing machine if not flushed properly!

6. Use black clothing marker to fix some parts if necessary.

7: Tada! New drumming shirt to put on to your next rehearsal or gig.

If you are planning to do something like this REMEMBER to:
 - be safe!
 - use gloves!
 - don't hesitate!
 - watch your eyes!
 - do it in the bathroom or somewhat similar space with a good ventilation!
 - use respirator if possible!
 - know what you are doing!

And again don't let animals or children anywhere near the bleaching process!

1. Ingredients 2. Rock on!

lauantai 9. marraskuuta 2013

Still active

We'll be warming up Rotting Christ in 22th of November at a local rock bar Rytmi-Katti and we've been rehearsing some older songs for that gig. Its' nice to give some polishing to those songs. I've also been dreaming to re-record some of those songs again with updated skills and touch I have today. I also sampled my drumkit from the recordings I made back in the days. I didn't remember the clips sounded so awesome! Maybe I'll post some soundclips later.

Drumage 2013

keskiviikko 6. marraskuuta 2013

Rimshots

I've never ever broken a drumstick like this in my lifetime during rimshots. Maybe it's technic or (the!) force, maybe it's wood or lathe they used. However, Soon I'll be in desperate need to buy a bunch of new drumsticks.

What is this sorcery? (Picture is not meant to harm the reputation of Balbex Drumsticks! It could happen to any known brand out there)


tiistai 20. elokuuta 2013

Cat toy (DIY Drum Stick Cat Toy)

DIY cat toy
I made this cat toy using a Steve Gadd drum stick, shoelace and couple of feathers from a golden pheasent and ostrich. This way my cat and I both get some good excercise. ;)

torstai 13. kesäkuuta 2013

DIY Drum cases

Here are suitable drumcases made from an old dry toilet (fortunately it's never been used) and a water barrel. I can fit my 14" tomtom and 14" snare to the bigger one and 10" snare and 12" tomtom to the smaller one.

Starting point 1
Starting point 2

Adding the padding 1
Adding the padding 2

Painting 1
Painting 2

Done!


tiistai 12. maaliskuuta 2013

tiistai 5. helmikuuta 2013

Recycling drumsticks (DIY Drum Stick Modifications)


Old drumsticks have many uses. Here's couple of them:

1. Stun the fish you catch with an old drumstick
This was made MacGyver style in the last minute when my friend was picking me up for an ice fishing trip. You need a duct tape, a piece of metal pipe and of course a drumstick, so go and smash one! I'll add a huge hook on the bottom of this stick later, so this will serve me later also as a lifting hook for even bigger catches.


2. Vacuum cleaner wheels made from old drumstick
My vacuum cleaner was broken pretty badly. I was going to throw the whole thing away, because finding the spare parts wasn't an easiest task. But as it is, the solution is always next to you. First I repaired its hose. I opened the hose adapter, shortened the hose a bit with scissors and glued them back together with Extreme Repair glue. Yesterday I replaced old broken plastic wheels with a pieces cut from old Vic Firth drumsticks. These 7A:s were the only models I've in my apartment at the moment. I think model 2A or 2B would be best size for this kind of mod. ;)

So my advice is to save your old drumsticks if possible. You never now when you need them and what for.

3. Warming up your sauna

(All pictures by me except 3. by J. Järvinen)

sunnuntai 27. tammikuuta 2013

Snaretalk Pt. II: Postmortem and Remembrance (DIY Tom to Snare conversion)

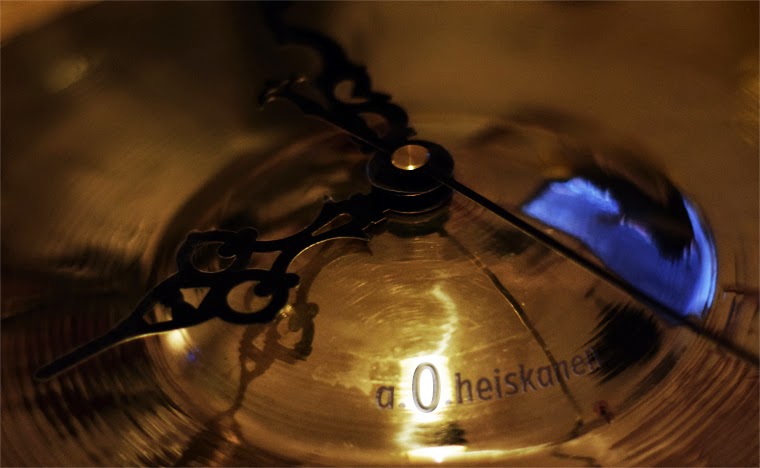
Finally got a chance to assemble this snare. I'm going to change the drum heads as soon as possible. I know it's not perfect, but it will do. This snare project took me over a year, but it was definitely worth it. Feel free to ask anything and I'll try to answer. Long story short:


Making this kind of equipment by yourself teaches you a lot. Of course a lot about drumming and also a lot more about your life and yourself. It brings forth your memories, even the painful ones. And I wan't to share some of them with you.

It's been about 16 years from that when I first played or even stood next to a real drumkit. If I remember correctly it was year 1997 and we were just about to start a fifth grade. That meant our class had to go to bigger school which was located 3 kilometers away from my home. The biggest change for me was that there were more musical instruments, especially band instruments, such as drums, guitars and so on.

I remember we had this old drum kit on our class room and it was missing a bass drum resonant head. Other class room for music class students had a Tama Rockstar drumkit and everyone was hoping to get to it also outside the music lessons. During the playtime in school we used to sneak into the music class and play our asses off.  I always wanted to go to actual music class, like my sisters did, but I couldn't get through the entrance exam.

I had played violin in music school for a while and in the long run it was quite boring. By the way, this was totally disproved in last summer by Kronos Quartet when they played at Kuhmo Chamber Music Festival. Violin really is also a percussion! What a show they put up! But during my short career as a violin player, I was so frustrated that I used to hack'n'slash my notes with a violin bow, and "accidently" take a violins bridge away so I couldn't practice anymore.

Me and my friends started to play "air drums" after the school and I even build my first barrel drumkit with the help of my father. After a while I jumped from violin to tenor horn. My teacher was also playing drums and because a tenor horn wasn't my kind of instrument he agreed to teach me drumming privately.

At first he asked me if I would like to learn to play with a double bass drum (I had almost broken my single pedal for trying to use it as a double bass pedal). Of course I wanted, so he carried another bass drum to the room. It was a different size, but it didn't matter. Goddamit, now I had two of them and I could play machine gun patterns all evening! After the first lesson I knew this was the right instrument and path for me. After that he helped me to tune my drum kit and we had many good conversations about metal bands like Sepultura during the theory lessons he held.

After primary school we moved to Southeast of Finland and I gained my access to the music class without entrance exams. There the teacher always said I played too loud, so there was usually some other guy playing drums during the classes, while I was trying to sing my lungs off. But we had couple of school projects where I could play rock and metal style songs. I wasn't interested in other instruments at the time, maybe I've should've.

I never imagined to reach this point when my parents bought me this used drum kit about 15 years ago:


lauantai 26. tammikuuta 2013

Snaretalk (DIY Tom to Snare Conversion)

Howdy!

Do you still remember that 10" tom I was going to convert to a snare? Well, now it's completely destroyed... Hahaa, just kidding! Last night I upgraded it to a whole new level by adding some Supi Saunavaha on it. It is a stainlike wax for wooden surfaces made from natural compounds. That stuff is usually used for sauna benches (propably best translation for 'saunanlaude'). The Instructions said it's not recommended for oiled surfaces, but I did it anyway. Because I can.

At first I tested wax on a piece of normal plywood, and it seemed to absorb well despite the oil. A bit of sandpaper and a steel brush did the job. So, firstly I used the steel brush to open a wood grain a bit, then roughened the surface with sandpaper, cleaned it with a brush and a vacuum cleaner. After that I finally added couple of layers of stain on it with a help of a piece of foam. Inside of the snare is then again opened a bit with the steel brush. It gives that special antique look I was looking for. After that I engraved those runes again, so they burst into the sight better. I'm sure there is no better time to do that, for gods sake it is full moon now!

I'm still thinking the right name for this piece of percussion. Something from the Finnish Mythology maybe...

I'm still in need of the appropriate snare heads before testing the sound itself.

Cut the bullshit, here's the situation for now:

Phases I, II and III

I'm in a hurry now, so pictures of full assembled snare coming later. Ride on!

-A. Heiskanen